At The Zoo
Wildlife photography is a very popular subject but is by no means as easy as most successful published images look. You have to get to where your chosen wild animal subject lives in it’s natural habitat. Then spend hours, days or even weeks trying to locate and get close enough for decent photos. The photographers who do go out to shoot wildlife for a living spend a huge amount of time and money in order to get their shots.
 |
For the photographic enthusiast the only way to get photos of exotic wild animals is in a zoo or wildlife park. Any zoo will have animals that would never be accessible or approachable by the average person. For the dedicated wildlife photographer, taking photos in these situations may be seen as cheating but it is really the only chance for many of us to capture images of such subjects.
There are pitfalls to shooting in a zoo or even a wildlife preserve and all sorts of obstacles to overcome in order to recreate a “natural” scene. A good wildlife image should have no sign of manmade elements. These include fences, concrete, signs, buildings, etc. Therefore even taking photos in a zoo is not as easy as it seems. It is a challenge on a whole different level to come away with a convincing image. However there are a few tricks and some basic compositional steps that can be carried out to create that image of an animal in it’s “natural habitat”.
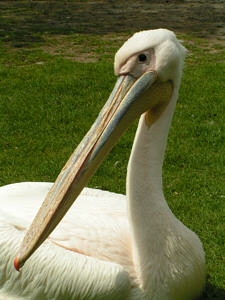
The image in fig 1 was taken in a wildlife park where some animals and birds roam freely amongst the public. The combination of a close proximity and careful composing has isolated this bird and kept any fencing or buildings out of the shot in the background.
 |
Whenever you see an opportunity for an interesting photo of an animal in a zoo, find an angle that eliminates any manmade elements in the frame of your image. This can be a difficult task and may take some looking around to get the most suitable position to shoot from. A long lens setting usually helps to narrow down the area of view of the background and helps to isolate the subject.
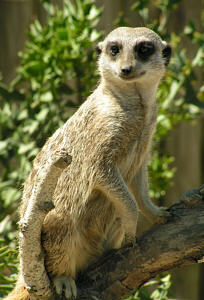
In fig 2 the out of focus background is courtesy of a telephoto lens and aperture of f4.5. With most cameras you can see this effect before taking the photo.
Fencing can be a real problem when trying to get a clear view of an animal. Where possible you may be able to get a clear shot through a fence but sometimes this may not be possible. A shallow depth of field can again be utilised in this situation to make the fencing disappear. Placing the camera up against a fence try and get a clear shot through the center of the frame. With a small f-number the fence will almost become invisible.
Would you like to know much more about depth of field and all other aspects of your camera? Our Creative Photography Course will show you, in the comfort of your own home, how to improve YOUR pictures. Full tutor support is included with the course so you won’t get lost and provides valuable feedback for rapid progress. All our photo courses include practical projects and photo assignments for you to complete and send to your tutor for critique and marking.
You CAN learn photography with our easy to follow lessons, and each course has a money back guarantee. See our FAQ page for more details.
